Part1 Scene1 — First floor lobby
Kay’s scene is almost finished. In order to save time, I asked her to start the next scene, so I started to help her modify some materials of this scene and start lighting.
I first modified the glass material of all the wine bottles, and then I realized that this scene didn’t match my model very well. At first, I thought it was the problem of mapping, but I thought that the mapping of my model was more realistic, which did not affect the final rendering. So I think maybe the scene model is a little close to the real scale, realistic style, and my character still belongs to the cartoon style. So I appropriately enlarged the items to make them look more lovely.
Before lighting, I looked for some references to help me understand and construct the lighting of this scene.
I hope it is a very strong top light effect in the overall dark environment. So I set the light source in a few chandeliers at the top. A separate global light is not set, because that will average the overall picture brightness.
In fact, I prefer this scene, because its lighting can have a great sense of atmosphere. I set up a point light source to match the model of this lamp.
We have three indoor and one outdoor. This is the first indoor scene. I still make it brighter, because comparatively speaking, I want the basement to be darker.
To highlight the character, I gave him two other lights to illuminate him.
The final rendering.
Part2 Scene2 — Attic
Before doing this scene, I found some movie lens references to help me understand the layout and lighting of the room
I really like the atmosphere and lighting effects in these two references below, that is, the obvious window trace and fog effect.
The reason why I like this scene most is that when I see two windows, I can do some detail treatment on these two windows, such as some light fog effect and the halo effect of candles.
In this scene, the light of the candle is a warm yellow point light with fog effect. Each of the two windows has a purple spotlight and a fog effect. In addition, I have a supplementary area light for the character.
By the way in order to ensure that the size of the characters in each scene is equal, we unified a size together.
I’d like to mention the fog effect light in particular, because I used it before when I was doing the bisect, but it took me a long time to forget. So I learned it again. The first is to create a spotlight with a certain exposure value.
Pull down the light attributes and find volume in Arnold. This is just similar to the volume light in Houdini of Mehdi. That is to say, if the value is reduced and magnified, combined with the establishment of fog effect light, volume light will be generated, and this value is used to control the visibility of volume light.
Open the render settings panel, click the Arnold render page, find the environment taskbar, select atmosphere, and select aiatmosphere volume to complete the light fog settings. For lights that do not need to set light fog, find volume under the light Properties menu and set it to 0.
resource: https://jingyan.baidu.com/article/8275fc86c4d7b106a13cf665.html
The final rendering.
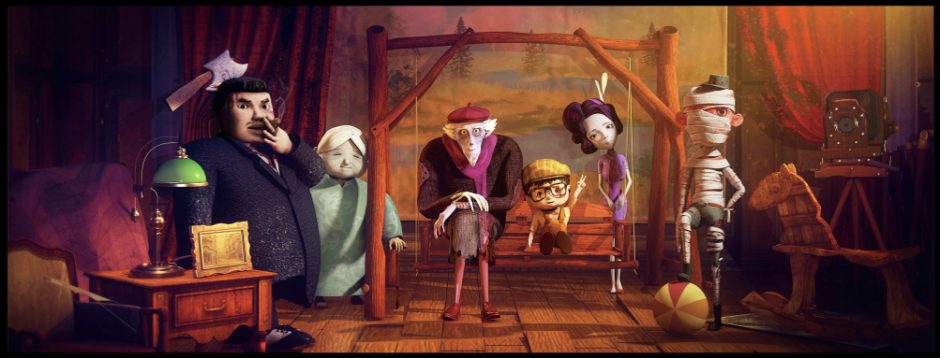
Part3 Scene3 — Basement
The feature of this scene is that there are many things and rich colors, so I hope the overall lighting tone is uniform. In this scene, I put a point light source in the top chandelier, and then the fog effect light of three candles, which is not very bright as a whole, but rather hazy and a bit gloomy.
So I found some game screenshots and atmosphere charts as a reference.
The lighting didn’t take much time this time, because some of the skills of the first two scenes are very proficient. In this scene, I decided the overall lighting, I hope it will be a complete hazy fog effect, and then fill some objects and d according to each lens, otherwise the character will be dark inside.
The final rendering.
Part4 Updating ( Modify attic lighting)
Because the students of the game are already designing the game interface, he asked me for a rendering. After discussion, we decided to choose this one, because the fog effect of the light is very atmospheric. We decided to create the atmosphere by lighting and color, not by characters. But because there were few things in the previous scene, some items were added to adjust the position of the items.
A haircut chair and some shredded paper are added. The distance between items is shorter and the feeling is more compact.
I roughly set the position of the light. In fact, I also adjusted the exposure value of some maps. Because in this very dark scene, I hope the object can still be seen clearly, so I want the maps of the main object to be brighter, and there are some color differences between various types of furniture.
The final rendering.
At the beginning, I adjusted the light exposure and color temperature. I adjusted the feeling of two kinds of light, one is the romantic warm purple, the other is the cold blue light in the morning.
Part5 Conclusion
Lighting can be said to be a part I like very much, including the KK course, I also learned a lot of new technologies and concepts. This process let me learn the role of different types of light sources, how to create volume light, how to improve the rendering quality of light. In addition, I am more proficient in the creation of lights, including color and intensity, and can basically achieve what I want.
Speed of progress: The students of the game have got our files and started to test the effect. Although there is no guarantee that the rendering effect is consistent with that in Maya, they will try their best. We also met with the sound effects students once, and she began to look for suitable sound effects and music. The main purpose is to meet the atmosphere, according to our reference between the hand and the object sound effect. We’ll animate next because both lightings is close to the end.