Part1 Rendering
The most important step is setting project. In that case, all scene maps will be recognized. Every time I do animation, in order to save time and prevent the computer from getting stuck, I can do animation without maps. Finally, I can merge them into a folder to recognize the maps.
This is the animation I rendered about 10 days ago. I encountered some problems when I used the school rendering farm rendering. One is that it sometimes jumps over a frame without rendering. For example, when I render animation 12, there are no 34 frames, which leads me to have no way to import a complete sequence frame into the PR clip. At the beginning, I didn’t find one frame missing. I repeatedly import failed, I even thought that the name of the exported sequence frame was wrong, and later I found that one frame was missing.
Or rendering a few frames, map display is not complete, it will lead to frame skipping, and I generally choose to re render that frame or copy the previous frame of lost frame, because sometimes the speed is faster and I can’t see it. Although this method is not desirable, it is still very effective in order to save time.
Part2 Toning
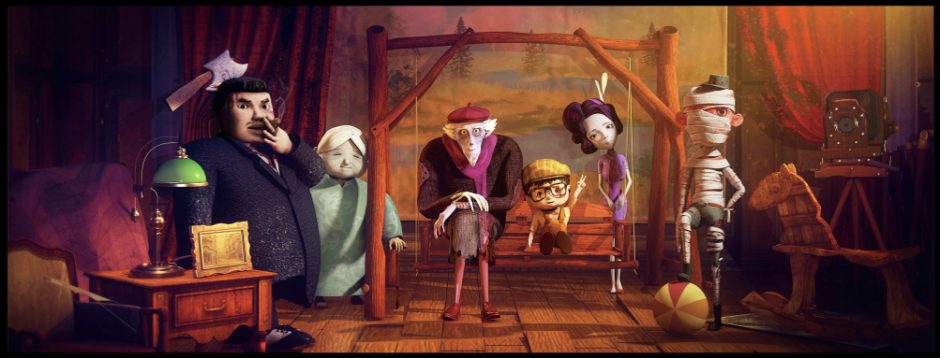
Toning the atmosphere image
In fact, the rendering is not completed in this week. Every time we finish an animation, we will render it. There are also rendered animations in the previous blog. And I usually choose a favorite shot to color. It lays the foundation for the color matching of the following animation clips, and at the same time, for more poster materials.
Color matching is actually my favorite part, because it’s the last program, and it’s a great achievement to watch the pictures become more atmosphere. This process is actually a test of my overall perception of the picture. I really like the picture with a sense of atmosphere.
Part3 Unity
Although I have done some walking and running animations with different postures and speeds before, the feedback from the students in the game said that if we need to combine our animations, they need to add more code. It would be more convenient for them to use plug-ins directly, so they gave a test video.
At the beginning, I gave them a model with binding. They said it would be more convenient without binding. Then I corrected all the maps to make sure that there is only Lambert and no Arnold material, because this material is not recognized in unity.
What they have to do next is the collision between the character and the table and chair, as well as touching the props to play the animation part. They asked me for a model of a razor, so I built one.
Part4 Conclusion
problems
In fact, I spend 4-5 hours every night sorting out the rendered files. One is to confirm various settings, including the image quality, the size of each sampling value, the setting of reducing noise, and the setting of camera viewing angle. But what bothers me most is that the Maya icon of rendering farm and desktop always disappears. At that time, I asked Luke how to solve the problem, but there were often failures. In order to avoid trouble, I didn’t ask again, but chose to keep changing the machine. I had to log out and log in again many times every time to find a suitable machine to render. It’s really troublesome and time-consuming!!!!
But I found that Emma also encountered this problem, but she asked Luke and solved the problem, also let me know how to solve this problem.
So I learned asking until solving it and this really saved a lot of time. Avoiding problems can only be solved for a while, not for a long time.